

Table of Contents
- What Is DTF Printing and How It Works
- DTF File Preparation and Design Setup
- DTF Printing Equipment and Supplies You'll Need
- Step 1: Load Film and Configure Print Settings
- Step 2: Print Design with White Ink and Color Layers
- Step 3: Apply Adhesive Powder and Cure the Transfer
- Step 4: Heat Press Application and DTF Transfer Heat Press Settings
- How Long DTF Transfers Last and Quality Durability
- Frequently Asked Questions
Last Updated: October 8, 2026
What Is DTF Printing and How It Works
Direct-to-film (DTF) printing is a digital process that prints full-color designs onto special transfer film, which you then apply to garments using heat and pressure. Unlike traditional screen printing, DTF lets you produce multi-color designs without separate screens for each color.
The DTF printing process step by step involves six main stages: design preparation, printer setup, printing with white ink and color layers, powder application, curing, and heat press transfer. Each stage matters. A mistake in any one can ruin the final product.
Here's what makes DTF different from other transfer methods. Screen printing requires separate screens for each color and works best for large runs. Heat transfer vinyl requires manual cutting and works only for simple designs. DTF handles complex artwork, fine details, and full-color gradients in a single pass.
Understanding the DTF printing process step by step helps you evaluate quality and troubleshoot problems when they occur.
DTF File Preparation and Design Setup
Your design file determines everything that comes next. A poorly prepared file wastes transfer film and adhesive powder. A clean file produces crisp, vibrant transfers.
Start with your artwork in a design program like Adobe Illustrator, Photoshop, or free alternatives like GIMP. Your design should be:
- At least 300 DPI resolution for print quality
- In RGB color mode (not CMYK), DTF printers use RGB
- Saved as PNG or PDF with transparent backgrounds
- Sized to your garment, measure the placement area first
One critical step most people skip: mirroring. The DTF printing process requires you to flip your design horizontally before sending it to the printer. The design prints onto film backwards, then transfers face-forward onto the shirt. Forget to mirror, and your text reads backwards on the final product.
Check your artwork for small details. Fine lines thinner than 2 points may not print clearly. Small text under 8 points becomes hard to read. Logos with intricate details need testing on a sample transfer first.
Color matters too. Bright, saturated colors print best. Pale pastels may look washed out. Test your color palette on a sample transfer before committing to a full production run.
DTF Printing Equipment and Supplies You'll Need
The DTF printing process requires specific equipment and materials. You can't substitute standard inkjet printers or regular transfer film.
Essential equipment:
- DTF printer, a specialized inkjet printer designed for transfer film
- Heat press, applies heat and pressure to bond the transfer to fabric
- Curing oven, melts the adhesive powder (some shops use heat presses instead)
- Work surface, clean, flat table for powder application and assembly
Required supplies:
- DTF transfer film, special coated film that accepts ink and powder
- DTF ink, includes white ink and CMYK color inks
- Hot-melt adhesive powder, bonds the transfer to fabric
- Garments, cotton, polyester, or blends you plan to decorate
The white ink is essential. DTF printers apply a white underbase first, then color layers on top. This white layer gives colors vibrancy and prevents them from fading into the fabric. Without proper white ink application, your colors look dull and wash out quickly.
Adhesive powder quality affects durability. Cheap powder may clump, leave debris, or peel after a few washes. Quality powder melts smoothly and creates a permanent bond.
Step 1: Load Film and Configure Print Settings
This is where the DTF printing process step by step actually begins. Your printer needs the right settings to produce good transfers.
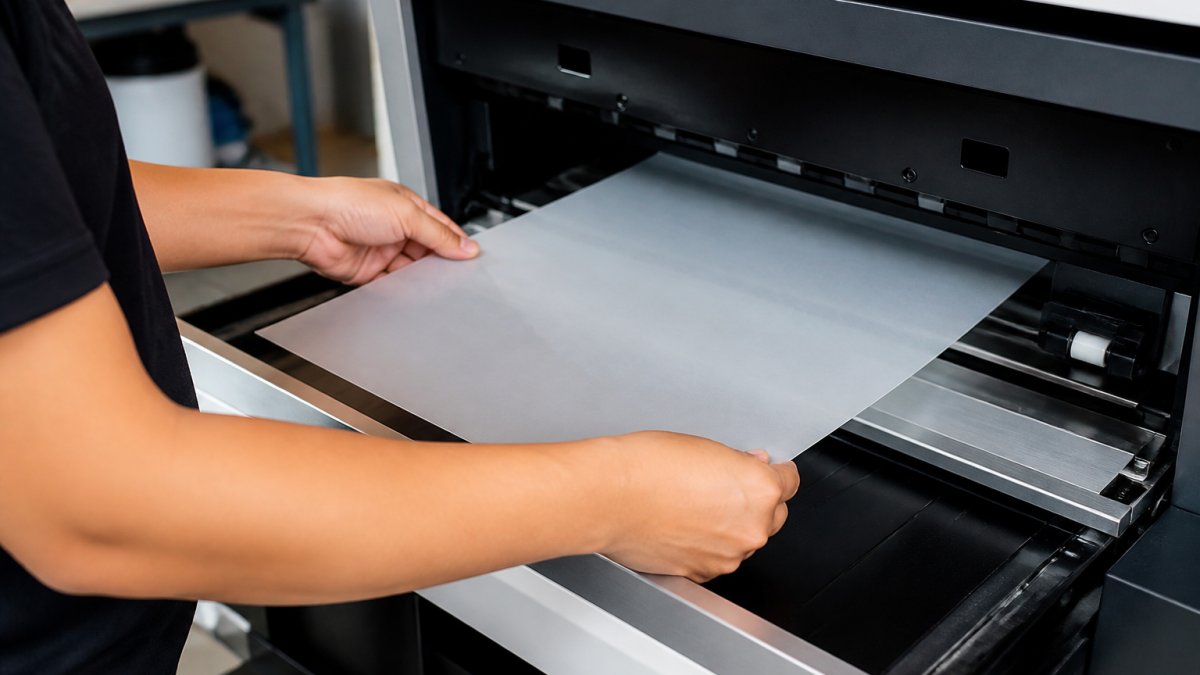
Load DTF transfer film into your printer's tray. The film has a coated side (shiny) and an uncoated side. The coated side faces up, this is where the ink lands.
Next, configure your print settings:
- Print mode: Select "DTF" or "Transfer" if your printer offers it
- Color profile: Use the profile for your specific film brand
- Ink density: Start at 100% and adjust down if you see banding or excess ink
- Print speed: Slower speeds (standard or high quality) produce better detail
- White ink layer: Set to print first, then color layers on top
White ink placement matters. The white underbase should be slightly smaller than your color layers. This prevents white ink from showing around the edges of your design. Most DTF printers handle this automatically, but check your software settings.
Test with a small section of film first. Print a 2-inch square of your design, apply powder, and cure it. This catches problems before you waste a full sheet of expensive transfer film.
Step 2: Print Design with White Ink and Color Layers
The DTF printing process step by step now moves to the actual printing. Your printer deposits ink in multiple passes.
White ink prints first as an underbase. This layer provides opacity and color intensity. The printer applies white ink across the entire design area, slightly larger than the final color image. This ensures complete coverage and prevents the fabric from showing through.
Color layers print next. The printer deposits CMYK inks (cyan, magenta, yellow, black) in precise amounts to create your full-color design. The DTF printer makes multiple passes, building up color density gradually. This multi-pass approach creates better color accuracy than single-pass printing.
The entire printing process takes 2-5 minutes per design, depending on size and complexity. Larger designs or high-ink-density artwork take longer.
Watch for common printing problems:
- Banding: Horizontal lines across the design usually mean ink density is too high. Lower it by 10-20%.
- Streaking: Vertical lines suggest a clogged print head. Run your printer's cleaning cycle.
- Faded colors: White underbase may be too thin. Increase white ink density in settings.
- Ink pooling: Wet spots where ink collects mean print speed is too fast or humidity is too high.
Once printing finishes, the film is wet with ink. Handle it carefully. Don't touch the printed side. Let it rest for 30 seconds before moving it to the powder application station.
Step 3: Apply Adhesive Powder and Cure the Transfer
This stage transforms wet ink into a durable transfer. The adhesive powder melts and bonds everything together.
Immediately after printing, while the ink is still wet, apply hot-melt adhesive powder. Use a powder shaker or applicator to coat the entire printed surface evenly.
Apply powder generously but not excessively. You want complete coverage without clumps. A light, even dusting works better than a thick layer.
After powdering, shake off excess. Tap the film gently over a waste tray. Loose powder falls away; powder stuck to wet ink stays in place.
Now cure the powder. This melts the adhesive and bonds it permanently to the ink. You have two options:
Curing oven: Place the film on a conveyor belt or tray and run it through a heat source set to 300-320°F for 3-5 seconds. This is fastest for production.
Heat press: If you don't have a curing oven, use your heat press set to 320°F for 10-15 seconds.
The powder turns from grainy texture to smooth, glossy surface as it melts. You'll see the color shift slightly as the adhesive bonds.
Let the transfer cool for 30-60 seconds before handling. Hot transfers are fragile. Cooling allows the adhesive to set completely.
Step 4: Heat Press Application and DTF Transfer Heat Press Settings
Now you apply the cured transfer to the garment. This is where design meets fabric.
Prepare your garment first. Wash and dry it if new. Preheat your heat press to 320-340°F. Temperature varies by fabric type:
- Cotton: 330°F
- Polyester: 320°F
- Cotton blends: 330°F
- Dark fabrics: 340°F (slightly higher helps adhesion)
Position the transfer on the garment exactly where you want it. Use a ruler or measurement marks if precision matters.
Close the heat press and apply pressure. Settings depend on your equipment:
- Pressure: Medium to firm (avoid maximum pressure, which can crush fine details)
- Time: 10-15 seconds for most fabrics
- Temperature: 320-340°F as noted above
The exact DTF transfer heat press settings matter. Too hot or too long and colors fade or the adhesive over-melts. Too cool or too short and the transfer doesn't bond properly.
After pressing, open the press and let the garment cool for 30-60 seconds. The transfer hardens as it cools. This cooling period is critical, don't peel or fold the garment immediately.
Hot peel vs. cold peel: Some transfers peel the film backing while warm (hot peel). Others require cooling first (cold peel). Check your transfer film's instructions.
Peel the film backing away slowly at a 45-degree angle. If the transfer sticks to the film, it didn't cure properly. Stop and re-press at slightly higher temperature.
How Long DTF Transfers Last and Quality Durability
A well-made DTF transfer should last as long as the garment. Poor execution fails in weeks.
Durability depends on several factors:
Adhesive powder quality, Quality powder creates permanent bonds. Cheap powder peels after 5-10 washes.
Curing temperature, Under-cured transfers fail quickly. Over-cured transfers fade but stick.
Heat press settings, Proper temperature and time create strong adhesion. Incorrect settings cause peeling or color loss.
Fabric preparation, Clean, dry garments accept transfers better. Wrinkled or wet fabric creates weak spots.
Wash care, Transfers last longer with gentle washing. Hot water and harsh detergents break down adhesion faster.
A properly executed DTF transfer survives 50+ washes without significant fading or peeling. Many last 100+ washes. This makes DTF competitive with screen printing for durability.
Test quality by washing a sample transfer. Use warm water, standard detergent, and normal cycle. Check after 10 washes for peeling, cracking, or color fading. If it holds up well, your process is solid.
Common durability problems:
- Peeling edges: Transfer didn't cure long enough or heat press temperature was too low
- Cracking: Over-cured adhesive or excessive heat press pressure
- Color fading: Under-cured or low-quality white underbase
- Debris in adhesive: Powder contamination or dirty work surface
The DTF printing process step by step produces excellent results when each stage is done correctly. Quality control at every step prevents costly mistakes.
| Stage | Critical Factor | Impact on Durability |
|---|---|---|
| Design prep | File resolution and mirroring | Poor files print blurry or backwards |
| Printing | White underbase coverage | Thin underbase fades quickly |
| Powder application | Even coating without clumps | Clumps create weak spots; thin coverage peels |
| Curing | Temperature and time | Under-cured peels; over-cured fades |
| Heat press | Temperature and pressure | Wrong settings cause peeling or color loss |
| Cooling | Time before peeling | Premature peeling breaks adhesion |
Understanding the DTF printing process step by step helps you produce transfers that survive dozens of washes and look vibrant on every garment. Mirage DTF Transfers handles the technical work so you can focus on design and customer service.
Frequently Asked Questions
How do you print DTF step by step?
The DTF printing process involves five main steps: prepare your digital design in design software and convert it to the correct file format, load transfer film into your DTF printer, print the design using white ink as an underbase followed by CMYK color layers, apply hot-melt adhesive powder and cure it in an oven, and finally use a heat press to transfer the design onto your garment. Each step requires specific settings and attention to detail to ensure quality results and proper adhesion.
What equipment and supplies do you need for DTF printing?
Essential DTF printing equipment and supplies include a DTF printer, transfer film, white and CMYK ink cartridges, hot-melt adhesive powder, a powder application system, a curing oven, and a heat press. You'll also need design software compatible with your printer, a lint roller for film preparation, and protective equipment like gloves and a dust mask for powder handling. Additional items include a heat-resistant cutting mat and precision cutting tools for trimming transfers after curing.
How long will a DTF print last after washing?
Quality DTF transfers typically last 50 or more wash cycles when applied correctly and cared for properly. Durability depends on proper curing of the adhesive powder, correct heat press temperature and pressure settings, and the fabric type. Cotton and cotton-blend garments generally show the best durability. Wash durability can be extended by washing garments inside-out in cold water and avoiding high heat in the dryer, which helps preserve color vibrancy and prevent peeling or cracking.
What makes DTF transfers different from other printing methods?
Direct-to-film printing differs from screen printing and sublimation because it uses a transfer film and adhesive powder rather than direct ink application or heat-activated dyes. DTF transfers work on virtually any fabric including dark colors, cotton, polyester, and blends without pre-treatment. The process produces vibrant colors and fine detail reproduction, making it ideal for complex artwork and small logos. DTF also requires no color separation or screen preparation, reducing setup time and making it cost-effective for low-volume and multi-color jobs.