

Table of Contents
- Understanding DTF Transfer Temperature for Cotton Shirts
- Recommended Temperature Ranges and Heat Settings
- DTF Pressing Time for Cotton: Dwell Time and Curing
- DTF Transfer Cold Peel vs Hot Peel Procedures
- Pre-Pressing Techniques and Fabric Preparation
- DTF Transfer Application Troubleshooting
- Post-Press Curing and Wash Durability
- Frequently Asked Questions
Last Updated: September 28, 2026
Understanding DTF Transfer Temperature for Cotton Shirts
DTF transfer temperature for cotton shirts is the critical heat setting that bonds your direct-to-film transfer to the fabric at the molecular level. Get this wrong and your transfer peels off. Get it right and you have a print that lasts through dozens of washes.
Cotton fibers don't fuse with adhesive powder like polyester does. Instead, heat must activate the powder's adhesive properties while pressure forces it into the fabric's weave, making temperature precision critical.
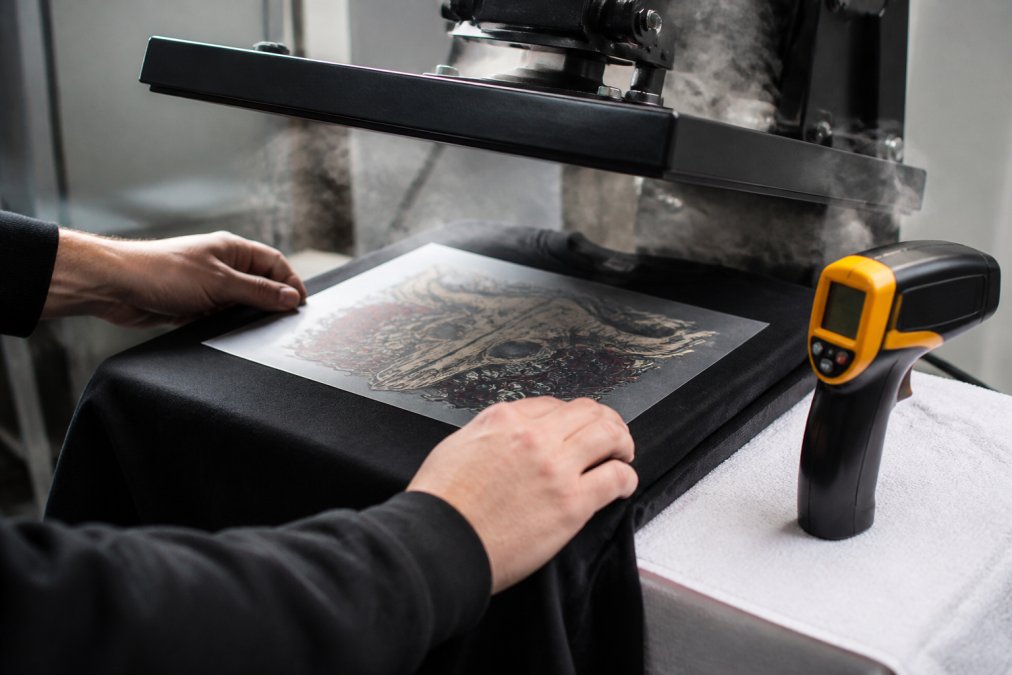
Temperature swings of just 10°F create visible quality differences: too cold and adhesive powder doesn't fully activate; too hot and you risk scorching or dye migration.
Cotton's moisture content affects heat response, freshly washed shirts absorb moisture differently than stored ones, and shop humidity plays a role. Most guides ignore these variables.
Recommended Temperature Ranges and Heat Settings
The ideal DTF transfer temperature for cotton shirts is 330-350°F, but dial settings often don't match actual platen temperature due to wear, contact pressure, and calibration issues most operators never verify.
Temperature Ranges by Cotton Weight
Here's the practical breakdown:
- Light cotton (t-shirt weight, 4-5 oz/yd²): 330-340°F for optimal bonding without scorching
- Medium cotton (sweatshirt weight, 7-8 oz/yd²): 340-350°F to penetrate thicker fabric weave
- Heavy cotton (canvas, tote bags, 10+ oz/yd²): 350-360°F for adequate adhesive activation through dense fibers
- Cotton blends (80/20 cotton-poly): 340-350°F to avoid damaging the polyester component
These ranges assume your heat press is actually delivering the temperature shown on its dial. Most are not.
Platen Accuracy and Calibration Verification
Heat press platens degrade over time from thermal cycling, oxidation, and residue buildup. A platen reading 340°F may deliver only 315-325°F at the fabric surface.
How to Verify Actual Platen Temperature
Use an infrared thermometer ($25-60 from hardware retailers). Avoid cheap models under $15; they lack the needed accuracy.
- Warm the press to target temperature and let stabilize 5 minutes.
- Set thermometer to emissivity 0.95.
- Take readings at five platen points: center and four corners.
- Calculate variance (highest minus lowest). Variance ≤5°F is acceptable; >5°F indicates hot/cold spots.
- Check average temperature. If >10°F below dial setting, recalibration is needed.
What to Do If Temperature Variance Is High
If variance >5°F or temperature >10°F below dial: (1) Clean the platen with mild degreaser; (2) Check platen level and contact; (3) Request professional calibration ($100-300) if variance persists; (4) Replace platen ($200-600) if >5 years old with significant variance.
Temperature Adjustment Based on Platen Reality
Adjust strategy based on actual temperature: increase dial by 10°F if platen runs 10°F cool; for hot spots (8-12°F variance), aim mid-range and add 1-2 seconds dwell time; if variance >12°F, service the platen before pressing.
Pressure Settings and Temperature Interaction
Medium pressure (40-45 PSI for t-shirt weight) paired with accurate temperature creates better adhesion than high pressure alone. Test your equipment with samples at 30, 35, 40, 45, and 50 PSI while holding temperature constant, then wash after 48 hours to find your optimal pressure baseline.
DTF Pressing Time for Cotton: Dwell Time and Curing
Dwell time (how long the press stays closed) is typically 8-12 seconds for cotton. Too short (5 seconds) and adhesive powder doesn't fully activate; too long (15+ seconds) risks scorching without improving results.
Dwell time varies by fabric weight: lightweight t-shirts need 8 seconds; heavy sweatshirts and canvas need 12 seconds. Post-press curing is critical, adhesive hardens for 24-48 hours. Avoid washing, folding, or stacking during this window. Many peeling failures stem from premature washing within 48 hours of pressing.
DTF Transfer Cold Peel vs Hot Peel Procedures
Cold peel and hot peel are two different techniques for removing the transfer film after pressing. Each has advantages for cotton.
Hot peel: Remove film within 5-10 seconds while garment is hot; adhesive stays soft for clean separation. Cold peel: Wait 30-60 seconds for full cooling; adhesive hardens for sharp separation.
Hot peel generally works better for cotton because warm film peels with fiber contraction, avoiding micro-tears. Cold peel works better for heavy cotton or dense weaves where fully hardened adhesive separates cleanly. Test both methods and document which works best for each fabric weight. Avoid waiting >10 seconds on hot peel, the garment cools and you lose the benefit.
Pre-Pressing Techniques and Fabric Preparation
Pre-pressing prepares cotton fiber structure and manages moisture to optimize adhesive activation, not just remove wrinkles.
Moisture Management and Humidity Adjustment
Cotton naturally absorbs moisture from ambient air. In environments above 60% relative humidity, cotton garments can hold 5-8% moisture by weight, which acts as a barrier between the adhesive powder and the fiber. This moisture must be driven off before pressing, or the adhesive powder will activate incompletely, leading to weak bonds that fail within 3-5 washes.
Measure your shop's humidity with an inexpensive digital hygrometer (available at hardware retailers for $15-30). If humidity exceeds 60%, implement one of these strategies:
- Pre-heat pass: Run the garment under the heat press platen for 3-5 seconds with the platen open (no transfer film). This drives off surface moisture through radiant heat without activating the adhesive powder. Test on scrap fabric first to ensure you don't scorch the garment.
- Air circulation: Position a fan to circulate air across stored garments. This reduces localized humidity and allows moisture to evaporate naturally.
- Desiccant storage: Store finished garments in sealed containers with silica gel packets to prevent re-absorption of humidity before pressing.
At altitudes above 5,000 feet, atmospheric pressure is lower, which affects how quickly moisture evaporates and how adhesive powder activates. If you operate at high altitude, increase your dwell time by 1-2 seconds to compensate for slower heat penetration and adhesive activation.
Fabric Weight and Weave Preparation
Cotton shrinkage is real and often overlooked. If your customer provides garments, ask whether they've been washed. Pre-washed cotton has already shrunk to its final size. Raw cotton from the supplier might shrink 3-5% in the first wash, which means your carefully positioned transfer shifts and appears misaligned after the customer's first wash.
For unwashed garments, you have two options: (1) pre-wash them yourself before pressing, or (2) position the transfer slightly smaller than your final desired size to account for post-wash shrinkage. Document which approach you use so you can set customer expectations accurately.
Fabric weight and weave affect how you position the transfer and how much pressure to apply:
- Lightweight jersey cotton (t-shirt weight, 4-5 oz/yd²): Stretches slightly under pressure. Position your transfer 2-3% smaller than final desired size. Use medium pressure (35-40 PSI).
- Medium-weight cotton (sweatshirt fleece, 7-8 oz/yd²): Minimal stretch. Press at full size. Use medium pressure (40-45 PSI).
- Heavy cotton (canvas, tote bags, 10+ oz/yd²): No stretch. Press at full size. Use medium-to-firm pressure (45-50 PSI) to force adhesive into dense weave.
Wrinkle Removal and Fiber Relaxation
Pre-pressing the garment itself, a 2-3 second press with the platen closed but no transfer on the fabric, removes wrinkles and relaxes the fiber structure. This is especially important for garments that have been stored, folded, or shipped. Wrinkles create air pockets between the transfer film and the fabric surface, preventing full contact and leading to incomplete adhesive bonding.
For heavily wrinkled garments, consider a longer pre-press of 5 seconds. This allows heat to penetrate the fabric and relax fibers without risk of scorching (since no adhesive powder is present).
Surface Contamination and Finishing Chemicals
New cotton garments often carry finishing chemicals (sizing, softeners, or water-repellent coatings) applied during manufacturing. These interfere with adhesive bonding. A quick pass with a lint roller removes surface dust and loose fibers. For garments with visible finishing residue (a waxy or stiff feel), use a soft brush or compressed air to remove particles. Some high-volume producers use a fabric conditioner spray designed to remove sizing, but test this on scrap fabric first to ensure it doesn't affect adhesive performance.
Document your pre-pressing workflow.
DTF Transfer Application Troubleshooting
Common issues and what actually causes them:
Transfer peels after 3-5 washes: Insufficient dwell time or premature washing. Verify your actual platen temperature with an infrared thermometer. If temperature is correct, increase dwell time by 2 seconds and test again.
Post-Press Curing and Wash Durability
The 24-48 hour curing window determines long-term durability. During this time, the adhesive powder continues to harden and bond deeper into the cotton fibers.
| Curing Phase | Duration | Conditions | What to Avoid |
|---|---|---|---|
| Phase 1 | 0-12 hours | Room temperature, dry air | Folding, stacking, humidity |
| Phase 2 | 12-24 hours | Room temperature, air circulation | Direct heat, direct sunlight |
| Phase 3 | 24-48 hours | Room temperature | Washing (wait until after 48 hours) |
Frequently Asked Questions
What temperature should I use for DTF transfers on 100% cotton?
Most DTF transfers on 100% cotton require 320-330°F (160-165°C) for optimal bonding without scorching the fabric. Start at 320°F and adjust upward if the transfer doesn't adhere fully. Cotton's natural fiber structure responds well to this range, allowing the adhesive powder to activate and cure properly. Always verify your specific transfer film's requirements, as formulations vary between manufacturers.
How long should I press a DTF transfer on a cotton shirt?
Dwell time for DTF on cotton typically ranges from 10-15 seconds at medium to medium-heavy pressure. This duration allows sufficient heat distribution and ink activation without causing dye migration or scorching. Thicker cotton blends may require an additional 2-3 seconds. After the initial press, allow 5-10 seconds for cooling before peeling to ensure proper bonding and transfer quality.
Should I use hot peel or cold peel for DTF transfers on cotton?
Hot peel is generally recommended for DTF on cotton shirts because it reduces the risk of transfer lifting or incomplete adhesion. Peel the film while the substrate is still warm (but safe to handle) at approximately 140-160°F. Cold peel can work if the adhesive has fully cured, but it increases the chance of edge lifting on cotton due to the fabric's weave structure. Test both methods with your specific transfers to determine which delivers better wash durability.
What should I do if my DTF transfer isn't bonding properly to cotton?
Check three factors: temperature (increase by 5-10°F if too low), dwell time (add 2-3 seconds), and pressure (ensure medium to medium-heavy pressure for adequate heat distribution). Verify the cotton shirt has been pre-pressed to remove moisture, as dampness prevents proper bonding. Confirm the platen is clean and level, uneven heat distribution causes inconsistent adhesion. If problems persist, inspect the transfer film for debris or manufacturing defects and contact your supplier for replacement stock.